With the help of Windows Subsystem for Linux (WSL), it’s now possible to run Linux programs on Windows 10. WSL creates a thin compatibility layer that allows Linux programs to access the same files and run services on an already existing filesystem and communicate seamlessly, so the two running operating systems can share resources effectively.
As great as Windows became in the last few years, there are things that Linux is much better suited for, especially development. Traditionally, developers would often end up using MacOSX because it supports all the usual command-line tools in Terminal and it’s also capable of running Microsoft Office, the Adobe Suite, and other common programs without Linux support at the same time. Now with WSL, this is all possible in Windows.
Virtual Machines
The traditional way to do run multiple operating systems on the same computer at the same time was to use Virtual Machine software that provides full hardware emulated virtual environment that needs to boot and load a complete secondary operating system to be useful. The drawback of this is that it’s a lot heavier on system resources and is also slower to boot and more difficult to interact with because it runs its own devices, services, and file systems.
Multiple virtualisation software packages are available, such as
- HyperV https://docs.microsoft.com/en-us/virtualization/hyper-v-on-windows/about/
- VMWare https://www.vmware.com
- VirtualBox https://www.virtualbox.org
- KVM (Linux only) https://www.linux-kvm.org/page/Main_Page
- QEmu https://www.qemu.org
Container based virtualization
Containers use the same basic operating system as the host, so they’re a lot easier on the resources and quicker to start. They don’t provide a complete hardware-level isolation, and depending on the implementation details, they may be able to share files with the host operating systems.
This advantage can also become problematic when there is a security breach in the software that runs in the container – programs can have easier access to the host operating systems because they share resources so when security is important, it’s better to use isolated virtual machines.
Because containers don’t need as many resources and separate operating system copies for each instance they’re running, the same hardware infrastructure can support much more containers than full-blown virtual machines.
Introducing the Windows Subsystem for Linux
Windows 10 provides a special compatibility layer to allow Linux programs to run inside a Windows 10 virtual machine.
There are two versions available, WSL v1 and v2. The previous version (WSL V1) is still supported, but the new system provides improved linux compatibility and full blown Linux kernel inside a lightweight virtual machine.
If you need to often share files between the container and host windows machine, WSL1 provides better performance because it’s not running on a (thin) virtual machine but directly accesses Windows services at the cost of some minor incompatibilities.
It is possible to run both WSL1 and WSL2 at the same time next to each other – WSL2 needs HyperV to be enabled, WSL1 will work without it.
Installing Windows Subsystem for Linux
Installation works on all recent Windows 10 versions, including Windows 10 Home. First, we need to enable the WSL layer. Open a Command Prompt as administrator and enter
> dism.exe /online /enable-feature /featurename:Microsoft-Windows-Subsystem-Linux /all /norestart

Deployment Image Servicing and Management tool
Version: 10.0.19041.844

Image Version: 10.0.19043.985

Enabling feature(s)
[==========================100.0%==========================]
The operation completed successfully.
If you get permission denied, you’re running it as an ordinary user, re-open the command prompt as Administrator and try again.
After a few seconds or minutes of waiting, the Windows Subsystem for Linux is ready to be used. WSL2 needs HyperV to be enabled. It needs a relatively recent version on Windows 10, so you may need to manually check for updates and make sure you’re running the latest version.
To install WSL2 with HyperV, run the following command from the same command prompt:
> dism.exe /online /enable-feature /featurename:VirtualMachinePlatform /all /norestart

Deployment Image Servicing and Management tool
Version: 10.0.19041.844

Image Version: 10.0.19043.985

Enabling feature(s)
[==========================100.0%==========================]
The operation completed successfully.
The machine will now need to be restarted to complete installation.
WSL2 will also need a kernel update package to be downloaded from the following URL: https://aka.ms/wsl2. If this is not installed, converting a virtual machine to V2 or trying to install it will result in an error pointing you to this URL.
Setting up Linux distributions inside WSL
After rebooting, the “wsl” command should be available to administer the Linux subsystem.
> wsl
Windows Subsystem for Linux has no installed distributions.
Distributions can be installed by visiting the Microsoft Store:
https://aka.ms/wslstore
By default, it’s installing V1 style virtual environments, that can be changed to 2 by entering
> wsl --set-default-version 2Now we’ll need to open the Microsoft Store and install our Linux version of choice. It’s also possible to automate this by downloading the appx package but for now let’s use the Microsoft Store because it’s simpler, open https://aka.ms/wslstore and pick your installation of choice from the possible options:
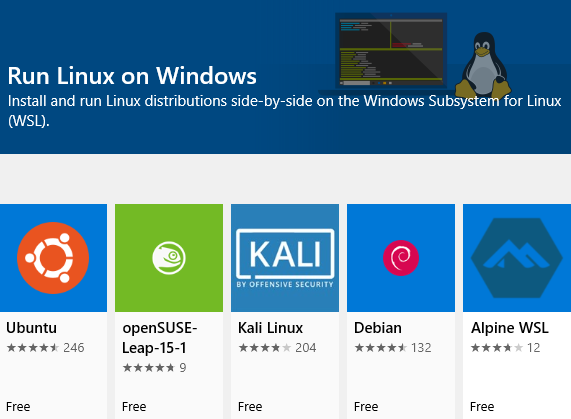
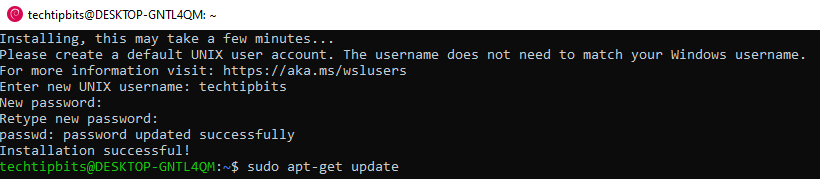
I’ve picked Debian and after skipping a few dialogs to avoid having to create a Microsoft account, we can launch our new Linux environment. We need to quickly create a new user and we’re ready to go.
Let’s complete setup and update packages to make sure we’re running the latest version. Don’t forget to run “sudo apt-get upgrade” in the end.
To switch between V1 and V2, we can use the “wsl” command (possible both ways):
> wsl --set-version Debian 2
Conversion in progress, this may take a few minutes...
For information on key differences with WSL 2 please visit https://aka.ms/wsl2
Conversion complete.
Accessing files between operating systems
From inside the Linux subsystem, the whole C: drive is accessible under the mount point /mnt/c. System files are protected and not accessible but anything else can be read and written just like ordinary Linux files (but slower – not so much slower in V1)
Under Windows, all WSL files live under the virtual share “\\WSL$”, for example, our Debian system’s local home directory can be accessed under \wsl$\Debian\home\techtipbits
PS C:\> cd \\wsl$\Debian\home\techtipbits
PS Microsoft.PowerShell.Core\FileSystem::\\wsl$\Debian\home\techtipbits> dir

    Directory: \\wsl$\Debian\home\techtipbits

Mode                 LastWriteTime         Length Name
----                 -------------         ------ ----
------         5/20/2021   8:00 AM            201 .bash_history
------         5/20/2021   7:42 AM            807 .profile
------         5/20/2021   7:42 AM            220 .bash_logout
------         5/20/2021   7:42 AM           3526 .bashrc
Running GUI Linux programs under Windows
Up until recently, WSL only supported console applications and it was impossible to run anything with GUI support unless you ran a separate X Server on Windows.
There is a free Windows X server available at https://sourceforge.net/projects/vcxsrv/. Once installed, start it and make sure you enable “disable access control” to allow the WSL subsystem to connect to it. Warning: this will allow all clients from your local network to connect and use the X server so it’s probably a good idea to firewall other clients to TCP port 6000 where it communicates.
As long as the X server is running in Windows, you can use Linux GUI programs just like you would in Linux. You’ll need to find out the local IP address of the Windows machine (start cmd, type ipconfig), then set it in WSL by using export DISPLAY=ip.add.re.ss:0
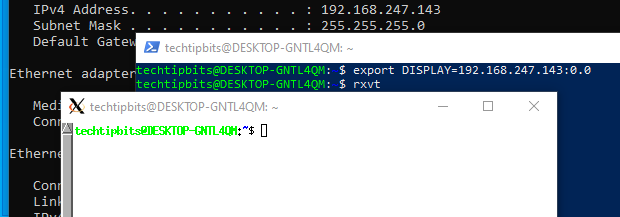
In the example above, the black window in the background is the Windows command prompt running “ipconfig” and showing the IP, the blue one is WSL where we ran the export command in Linux. After that, simply starting “rxvt” (a GUI terminal program that was installed using apt-get install rxvt) runs just like it would on a Linux desktop.